A few of my framed paintings at Yarmouth Frame and Gallery
I was talking with my friend Amy a few days ago. She’s just renovated a triple decker in Portland's up-and-coming Munjoy Hill, and the first floor is now available on airbnb (check it out). She's got some pictures she needs to frame. So I thought I'd share my framing resources with Amy, and post them here for you.
First, it's easy to buy quality picture frames online, and very affordable. And buying them online, you can have the frames cut to whatever size you need. I buy mine from Florida Frames, and sometimes Graphik Dimensions (pictureframes.com). But there are lots of places to choose from, here are some that Carol Marine recommends:
www.frankenframes.com - Franken Frames
www.canvasplace.com - Canvas Place
www.kingofframe.com - King of Frame
www.metroframe.com - Metro Frame

current frame favorites

Florida Frames samples
It's pretty straightforward to frame an oil or acrylic painting. All you need is the frame, a few pieces of supporting hardware, and some good tools. Below are the hardware and tools that I like and where to get them. Framng4Yourself.com is great resource, both for the hardware and for instructions.
The first task is to secure the painting in the frame. And I’m talking here about a wooden frame and a painting on a panel or canvas. A point driver is used to drive little metal darts called points into the frame, and those hold the painting securely in the rabbet of the frame (the part in the back that’s recessed). When you order a frame, order one with the dimensions of the outside of the painting. You’ll find that ordering an 8”x10” frame, for example, there’ll be a bit of wiggle room for the painting in the frame, you don't have to add that in when you order. Note also that the rabbet will have to be deeper than the thickness of the painting in order to use the point driver method.

point driver, where to order
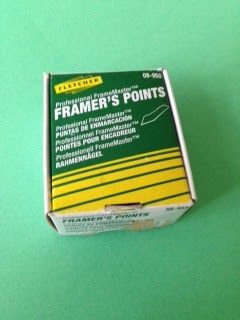
points, where to order
I generally check the frame to see which side will look best as the top, dust the frame off, and lay it face down on a towel or something non-abrasive before dropping in and securing the painting. For 8"x10" paintings or smaller, I use one point per side, for larger paintings, I use two per side. An old palette knife is useful for positioning the painting in the frame as it's laying on your workbench.

point driver positioned to drive the point into the frame
The next task is to attach a wire for hanging, for which I use little gadgets called strap hangers. Always double check to make sure you know which is the top of the painting before making any holes in the back (I’ve messed that up a few times!). I make the holes for the strap hangers about 1/3 of the way down the back of the frame from the top edge. And I use an awl to start the hole for the screws that hold on the strap hangers. This is less work than drilling the holes, and I rarely find a frame that’s too hard for this approach. If you want, you can make a couple of hits with a nail set into the hole made by the awl to get a deeper hole.

strap hangers and screws, where to order

awl, where to order

nail set and hammer, available at your local hardware store
Picture hanging wire is readily available at your hardware store, and Framing4Yourself has a great selection. Choose wire that’s rated for more than the weight of the painting plus frame. I find the non-coated wire to be easiest, but that’s a personal decision. Needle nose pliers and wire cutters are also useful.

wire

needle nose pliers and wire cutters, available at your local hardware store
The pictures below show how to connect the wire to the strap hangers. Note, there is no painting in the frame in these photos. I sometimes make up the frames beforehand, and that works fine too. Another thing I like about this approach is that is very easy to remove the painting from the frame and replace it with another one. And you can do it without taking the wire off.
strap hanger screwed to back of frame

wire tied on to strap hanger

excess wire wrapped around the hanging wire (be sure to neatly cut off the end)

an extra knot before wrapping the wire (I do this for larger paintings)

bumpers

back of framed painting
To finish off the framing, be sure to include information about the painting on the back, e.g. title, painter, location, etc.