Tuesday, January 19, 2016

Circles on Squares

"Circles on Squares"
6 blocks, 4"x4"x1 1/2" each, acrylic on cradled panels

Cradled panels drying on vitamin bottles

ArtRage mock up of the colors to be painted on each block
(ArtRage on an image of the painted blocks)

palette after painting the circles
airbrush medium was used to thin the acrylic

finished blocks

I'm entering a juried show at the new Artists Corner and Gallery in Acton, MA. The theme is Homage to Kandinsky's Circles, which you can see here. I decided to make each square on a separate small cradled panel. That way there are many ways to arrange them on a wall, or they can be stacked on a shelf. Pretty wild aren't they? I hope this piece gets in, it took rather longer than I expected!

Monday, January 18, 2016

Painting on a Time Budget Workshop

 Demo of tangerine on blue background
4"x4" oil over acrylic under painting

Acrylic under painting example

Yesterday I taught a fun workshop at Artascope in Yarmouth, Maine. Students had gathered to learn how to put together a regular painting practice on a time budget. I'm a big believer that painting small paintings regularly, and doing your best to finish them in one sitting is the way to go to see fast improvement in your work. I also think that an approach using a solid value under painting makes for better composition, and thus better paintings. This was the basis for our workshop. 

Even for our small timed paintings, like the tangerine above, we did value under paintings. In that case the under painting was in acrylic with the color added in oil or acrylic, depending on the student. Painting over a value study allows you to make sure the value of the mixed color is correct. Put a dab of mixed color over the value and squint. If the color becomes indistinguishable from the value background, it's the right value. Students did several of these, as well as value studies, and added color over a value under painted landscape.

Color over Value Process
  1. Notan thumbnails in sketchbook
  2. Draw to size on canvas
  3. Block in value under painting (3 or 4 values)
  4. Add color over value (squint to check for value match)
  5. Refine shapes and values
  6. Highlights and pizzazz
-->
Disclaimer: I've learned most of these techniques from the wonderful teachers I've studied with, in particular, Anne Blair Brown, Lori Putnam, Marc Hanson, Peggi Kroll-Roberts, and Carol Marine. Please forgive me if I've left anyone out!


The Bedroom Studio

Bedroom studio with desk replacing the bed

Desk with Ikea "Alex" drawers and "Billy" bookcase

Cardboard boxes used for organizing things

Cardboard boxes slide away under the shelf

Brush organizers made from paper towel tubes

Shoe box of framing tools

As part of the workshop I taught yesterday on building a regular painting practice on a time budget, we talked about how to minimize the obstacles that get in the way of painting regularly. See the list we discussed at the bottom of this post.

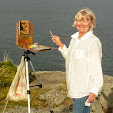
I showed the above photos of my "bedroom" studio. For years I painted in this small bedroom, setting up my still life on a cooler sitting on the double bed which took up most of the floor space! Eventually we needed fewer bedrooms and I was able to move out the bed, install an old desk set up that was headed for the dump, and over time added a couple of Ikea items. But I'm still heavily invested in cardboard, as you can see by the organizers in the photos above. Note that even the taboret is a big cardboard box, and there are others around the room, taped shut, which are used to make stands for still life set ups. The fancy easel is new, for a long time I used either an aluminum Stanrite easel or my plein air box and tripod.


Make it easy to paint - get rid of the obstacles

-->
Minimize set up and clean up

·      Studio in a bedroom

·      Easel

·      Masterson box for palette

·      Big flat box under the bed )to hold your supplies when not in use)

·      Cardboard boxes are great

·      Ikea is great

·      Ziplock bags are great

·      Paper towel tubes are great

·      Glass and plexiglass make good palettes


Be prepared

·      Decide what you’re going to paint the day before, anticipation motivates

·      Set up your still life the day before

·      Crop your photo the night before


Timing

·      Paint before you start doing anything else, especially before you get in the car…

·      Tell yourself you only have to do step x this session

·      Tell yourself you only have to paint for one hour


Paint!

·      Paint small and finish in one session – achievement is a great motivator!


Disclaimer: Some of these ideas are mine, but many come from artist friends and teachers. Thanks to everyone for sharing!


Sunday, January 10, 2016

Abstract Notans

 Number 1

Number 2

Number 3

Number 4

Cropping in Photoshop

Drawing and painting aren't the only way to experiment with composition. For these notans, I tore up black construction paper and laid the pieces out on a piece of white paper, then moved them around. I took some photos with my phone and opened them in Photoshop for cropping. The combination of moving the pieces and adjusting the crop creates the composition. You could crop on your phone. But I found that I had to try several crops on each image before I got something that I liked, so Photoshop, where I could save each version, was easier.

Which one do you like best?

I think this could be addictive!
 

Wednesday, January 6, 2016

The Useful Notan

Across from Library, Littleton, MA

Across from Golf Course, Maynard, MA

Across from Old Baptist Church, Yarmouth, ME

Four Corners, Groton, MA

A simple Notan (the word means dark light harmony in Japanese), contains only black and white. The Notans above were drawn using the principle that, anything in sunlight is white, anything in shadow is black. We've all learned that a compelling composition can be made when 2/3 of the composition is light in value and 1/3 is dark in value, or vice a versa. The Notan is a wonderful device to show us if we are achieving that goal. I know that on my first pass, I'm usually too close to 50/50 ratio.

It's easiest to draw Notans like those above, where the sun gives us an obvious choice for light and dark. But if you are inside, or the day is overcast, you have to make your own judgement as to where the threshold for light and dark should be placed. That often requires experimentation. Take a look at the page below, where I drew thumbnails of a bed, with a lighted lamp on a table to the left side of it. My first drawing is at the top left, and final drawing is at the bottom right. Which of these do you find the most compelling?


Saturday, January 2, 2016

More People at the Market

Figure 3
oil on treated paper

Figure 4
oil on treated paper


Figure 5
oil on treated paper


Above are a few more value studies of figures of people in markets in France. I went back to the original photos as references for the five studies. And before I started, I watched two of my favorite Peggi Kroll-Roberts videos. You can check them out on her website here (scroll down, these two are in sets 2 and 3).

My personal favorite is Figure 3. How about you? And I promise, there will be color soon!